How To Find and Photograph the Daffodil Flats in Linville Gorge
The Daffodil Flats are well-known by Linville Gorge enthusiasts. Every March, many people make the trek down into the valley to see these spring beauties. They typically bloom during the first two weeks of March, but your best bet for knowing the status of these flowers is to keep your eye on the Linville Gorge Facebook Group.
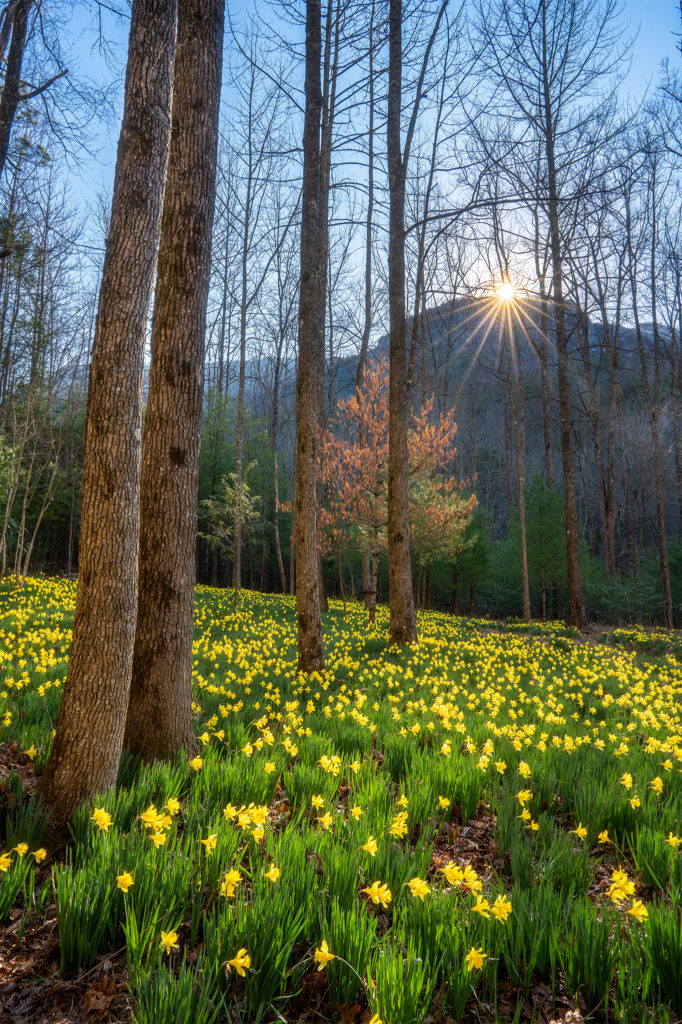
I lucked out and caught the blooms at peak on March 3rd. In this article, I’ll tell you how to get there and how to photograph the daffodils when you arrive!
How to get to there
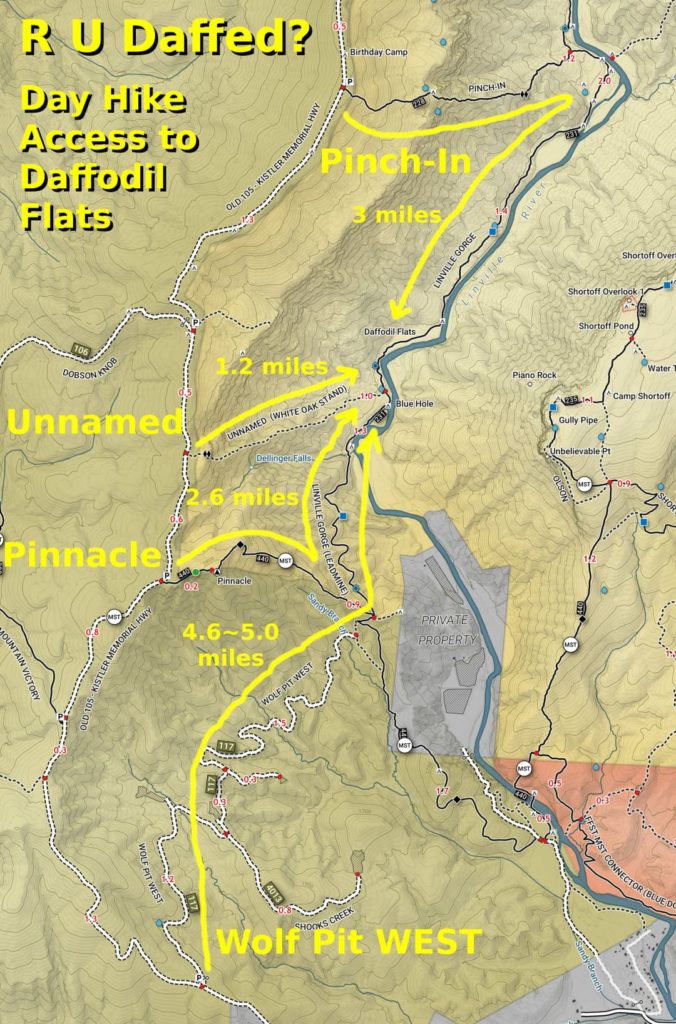
The Flats are located in Linville Gorge Wilderness which is about 18 miles north of Marion, NC. There are a few options for trails, each of which has trade-offs. I took the “Unnamed Trail”, which also shows up as White Oak Stand Trail, depending on which app you use. The three best trail options to get you there begin off of Old 105, aka Kistler Memorial Highway. Google Maps link below. The best app for navigating the trail systems of Linville Gorge is the Linville Gorge Wilderness map on Avenza Maps. Avenza Maps is free to use. Once you open the Avenza app, you’ll want to do a search for “Linville Gorge Wilderness” and download the map, also for free. This will allow you to use GPS to get you to your destination.
Google Maps link to get you to the “Unnamed Trail” trailhead: https://goo.gl/maps/Cd3N4ajXvADKyFCY8
“Unnamed Trail” is a short but brutal one-mile descent straight down into the valley, 1,350ft of elevation change. The upper stretches of this trail are so steep that if it were any steeper, you would need a rope to safely get down and up. This trail should not be attempted unless you are an experienced hiker in good shape. When you get to the bottom of the trail, take a left and head north on the LG Trail, the flats are just a few hundred feet further up the trail on the left from this trail intersection. They’re hard to miss!
Alternatively, there are other trails that can take you to the bottom but none of them are “easy”. Refer to Kevin Massey’s screenshot below:
Thanks for that, Kevin! Regardless of which way you choose to go down, bring plenty of food and water. I always, always underestimate how much water I need when descending down to the gorge valley.
When to go
As stated above, the blooms typically are at their peak during the first two weeks of March. As far as photography is concerned, I recommend you go early in the morning, ideally on a sunny day. On March 3rd, 2022, I started on the trail at about 5:25 a.m., which I found was earlier than necessary in regards to photos. However, getting down there so early meant I had the place to myself for two and a half hours! To make this whole process a little easier on yourself, you can camp at one of the many car campsites found along Old 105 and take a very short drive to the trailhead once you wake up.
As I headed out in my Jeep at around 11 am, I saw a bunch of cars piling up at the trailheads, justifying my decision to head out early in the morning.
Tips on photographing the daffodils using a smartphone or camera
Capturing a really solid landscape photo of the Daffodil Flats can be a bit tricky, involving things like focus stacking and bracketed shots for HDR. These are some of the techniques that we teach on our tours. These little flowers sway from side to side with the slightest breeze, making focus stacking almost impossible. More about some of those challenges further down in this article.
If you get on location before 9 am, the flowers will be in the shade of Shortoff Mountain. I ultimately liked the shots I took post-sunrise vs pre-sunrise. The sun gave the flowers an extra glow and gave the scene more depth. I used the Sun AR feature on the PhotoPills app to determine exactly when the sun would come over the mountain and illuminate the field. I could have just been old school about it and looked behind me to see the sun creeping down the valley but using the app was more fun 🙂 and it told me exactly how long I had to chill and listen to my podcast.
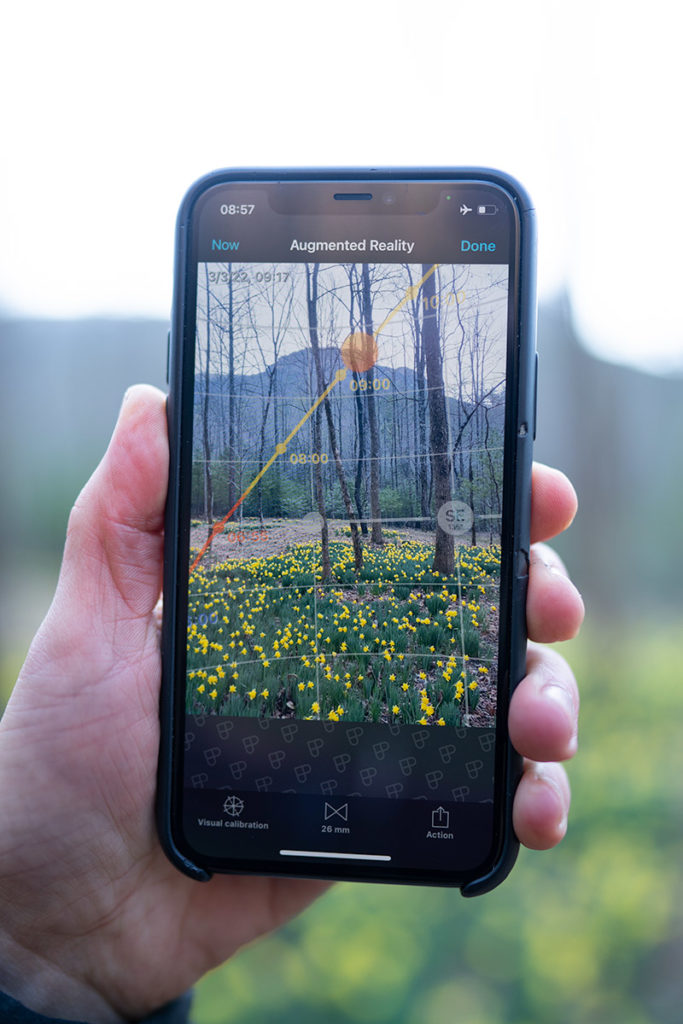
Using the PhotoPills Sun AR app
Composition
I recommend trying to position your camera to include the parts of the field that are filled with flowers. I mean, duh, right? There are parts of the field that don’t have many flowers, as shown above. To put a little more emphasis on the daffodils, you want to move your camera pretty close to the flowers, anywhere from a few inches to a couple of feet depending on what focal length or lens you’re using. As far as height goes, I found that a height of about 3′ above the flowers gave the best results. This height still has you close to the flowers, but not so low to where the flowers block the depth and length of the field (if that makes sense).
Trying to include Shortoff Mountain in the background of your composition will give more context to the setting that you’re standing in but you’ll need to use a wide-angle lens to capture the entire scene. If you’re using a smartphone, this concludes the tips for you.
Using a DSLR or mirrorless camera
Before the sun came up, I found it difficult to keep my ISO low, which is my rule of thumb. I started the morning shooting at around f11 which gave me a shutter speed of around 1/10th of a second, using an ISO of around 320. This shutter speed proved to be a little too slow for the flowers gently rocking back and forth in the breeze, and f11 left much of the scene out of focus due to my proximity to the flowers. If you’re patient enough, you can wait for breaks in the wind. Ideal settings would have been around f16 (to get the whole scene in focus), with the shutter speed of at least 1/60th of a second to reduce motion blur, and ISO of 100.
Once the sun started to peek over the mountain, I was able to land on more ideal settings since there was now enough light: f16, 1/50, 100. The second I started to see the sun, I shot off three bracketed shots, +/- 2.0 EV, with the focus set to the far background. With the sun partially blocked by the mountain, this gave me a decent sunburst or star effect.
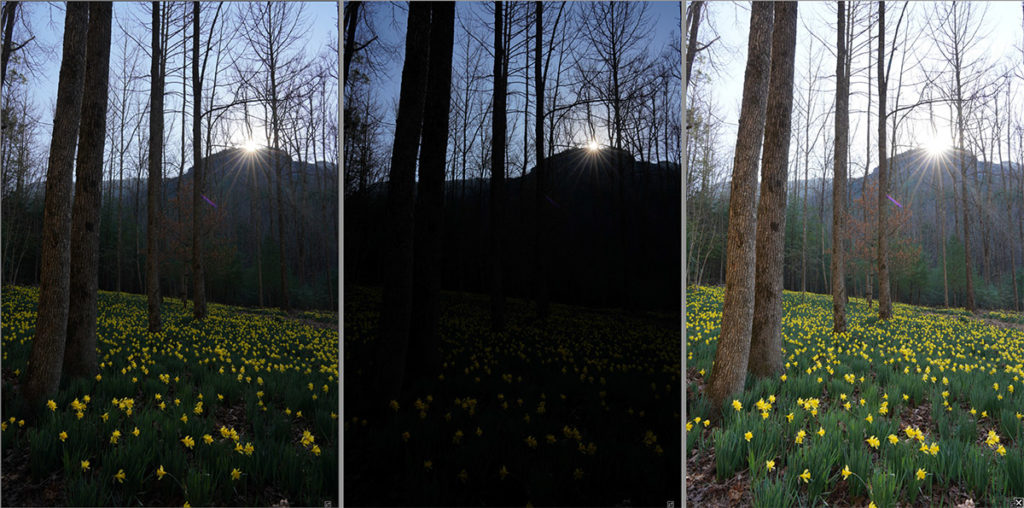
After waiting for a minute or two for the sun to illuminate the flowers more, I repeated the same process. The second time I set the focus to the very near foreground for focus stacking in post-processing. With an aperture of f16, it only required two shots with different focus points. I arguably didn’t need to focus stack this scene but I wanted to be thorough.
Processing
I now had six shots to combine into one once I got home. One set of three bracketed shots with the focus set to the background, and another set of three with the focus set to the foreground. Processing all of these shots together was a little tricky and too much to explain in this article, but I hope to do a post-processing tutorial video of this process at a later time. If you’re interested in that video, keep an eye on our newsletter!
The final, processed shot.
Conclusion
This experience is totally worth the tough but short hike if you’re really into photography. It’s such an incredibly peaceful spot! Please be careful to not trample any of the flowers and ruin it for other people. Thanks for taking the time to read this article!
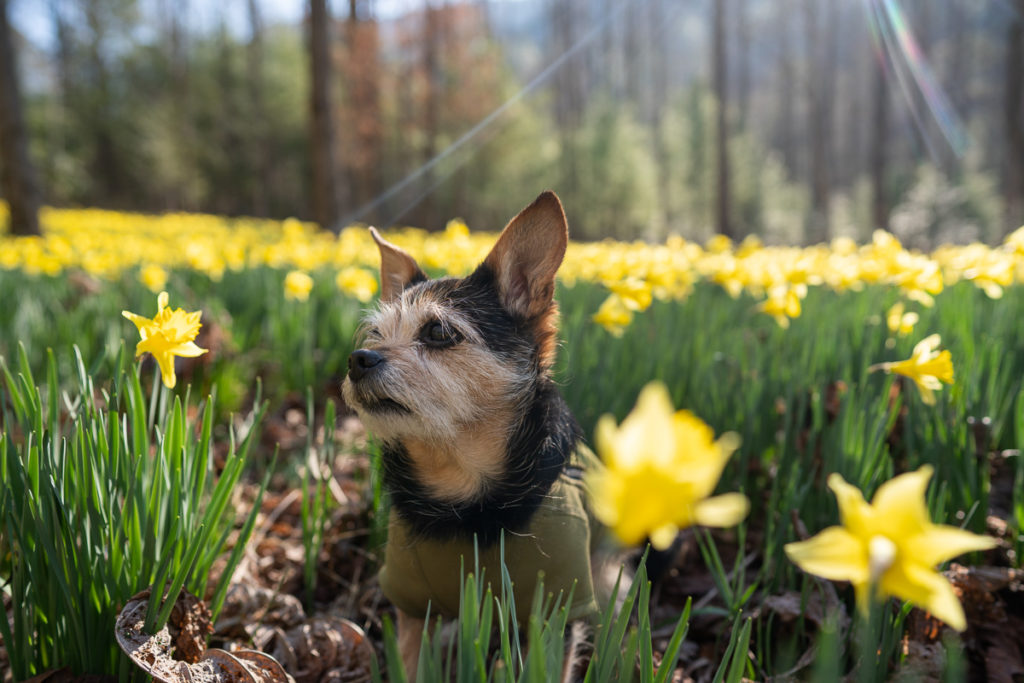
My wonderful trail buddy


